

How To Install Canon Pixma Mx922
Description
Larn how to connect your PIXMA MX922 to a wireless network (LAN).
Solution
View one of the videos below, or follow the written instructions to connect your PIXMA MX922 to a wireless network from a Windows or Mac® figurer.
Earlier you begin
-
Check to encounter if your router is WPS-enabled. If you aren't certain, refer to connect your printer via WPS .
-
If you recently changed wireless routers or the security settings on your current router, the printer may lose its connection to the wireless network. In this case, reconnect the printer to your network.
Standard Setup
Connect your printer to a wireless network (with a Windows computer).
Connect your printer to a wireless network (with a Mac calculator).
Written Instructions
Connect your printer to a wireless network
To connect your printer to a wireless network (LAN), follow the steps below.
-
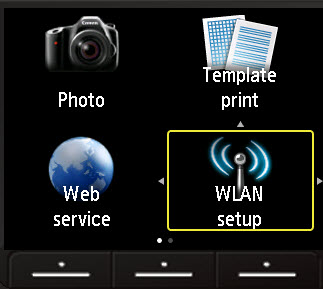
Printing theBill of fare button on the printer.
-
Use the arrow keys to highlight WLAN setup, and then pressOK.
-
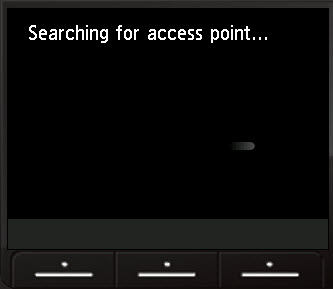
The printer searches for nearby networks.
-
The screen below appears withStandard setup selected for yous. Press OK.
 If a WPS-enabled wireless router is nearby, a bulletin will appear on the screen telling you lot to printing the WPS button on the router, then the OK push button on the printer. If you don't desire to connect to that WPS-enabled router, press theEnd push on the printer to bypass this message.
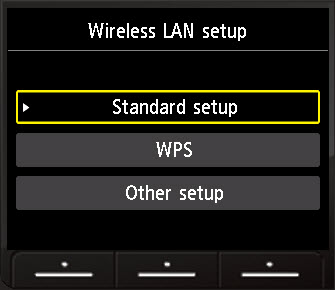
-
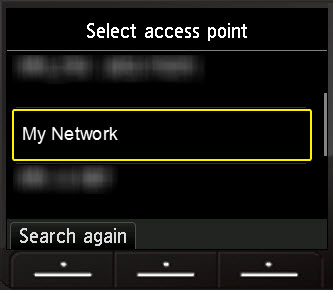
The printer searches for nearby networks and displays a list of nearby networks on the screen. Apply the up / down arrow keys to select your network from the list. And then printingOK.
-
If your wireless router has a password, theEnter passphrase screen displays.
If your wireless network doesn't have a password, the printer will endeavor to connect to the network automatically. When it connects, printingOK.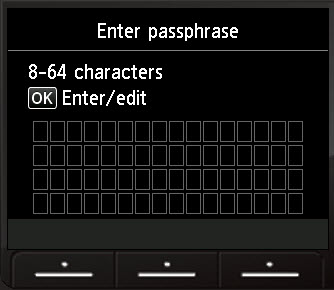
-
PressOK to go to the character entry screen.
-
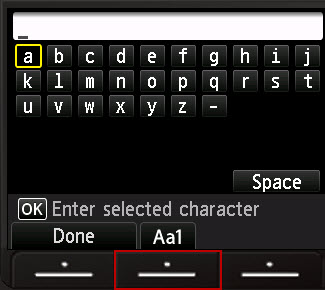
On the graphic symbol entry screen, utilize the arrows and theOK push button to enter in the characters for your password.
-
Lower example letters display by default. Printing the middleRole button (beneath Aa1) to switch to upper case.
-
Press the middleRole push button a 2nd fourth dimension to switch to numbers and symbols.
-
Press the rightFunction push button (below Del. grapheme) to erase an wrong entry.
-
Refer to enter numbers, letters, and symbols for more data.
-
-
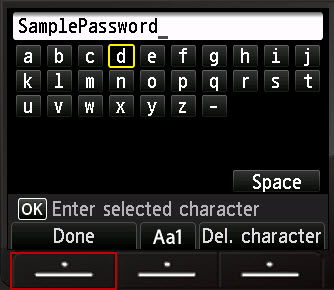
Later you enter the password, press the leftRole button (nether Done).
- Y'all will return to theEnter passphrase screen. The password you entered displays. PressOK to make corrections. If the entry is correct, printing the leftFunction key (under Finish setup).
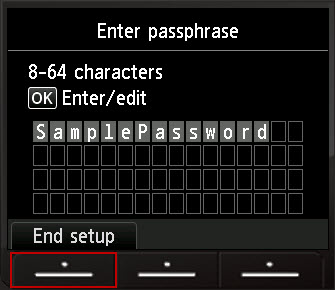
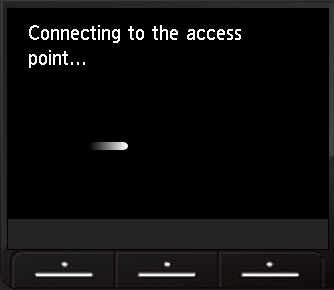
- The printer attempts to connect to the network.
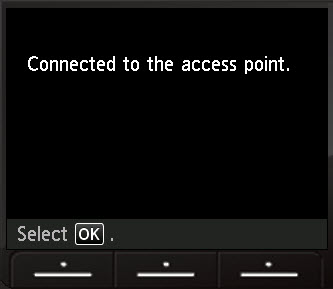
- When the printer connects to the network, pressOK.
If the printer fails to connect to the wireless network
-
PressOK and verify that the password you have entered is correct.
-
Brand any needed changes.
-
If the countersign is correct, unplug the router, wait xv seconds and plug it back in. Attempt again to connect.
Install setup software
In one case your printer connects to the wireless network, you will install the printer software on your computer.
Acquire how to gear up the software using the Setup CD on a
Windowsor
Mac®computer.
Yous tin can also set up a Windows or Mac® estimator by downloading the latest software from the Catechism website.

Source: https://support.usa.canon.com/kb/index?page=content&id=ART164598
Posted by: seamanviespork.blogspot.com
0 Response to "How To Install Canon Pixma Mx922"
Post a Comment